Home / Keptn v1 Docs / Release 0.15.x / Manage Keptn Project/Service / Git-based upstream
Git-based upstream
Keptn manages a project in an internal Git repository. To upstream this repository to a remote place that also works as backup, it is recommended to create, for example, a GitHub repository. This GitHub repository is then specified as upstream repo when creating a project.
- If you have already a Keptn project created and you want to set an upstream afterwards, you can do this with the keptn update project command explained below.
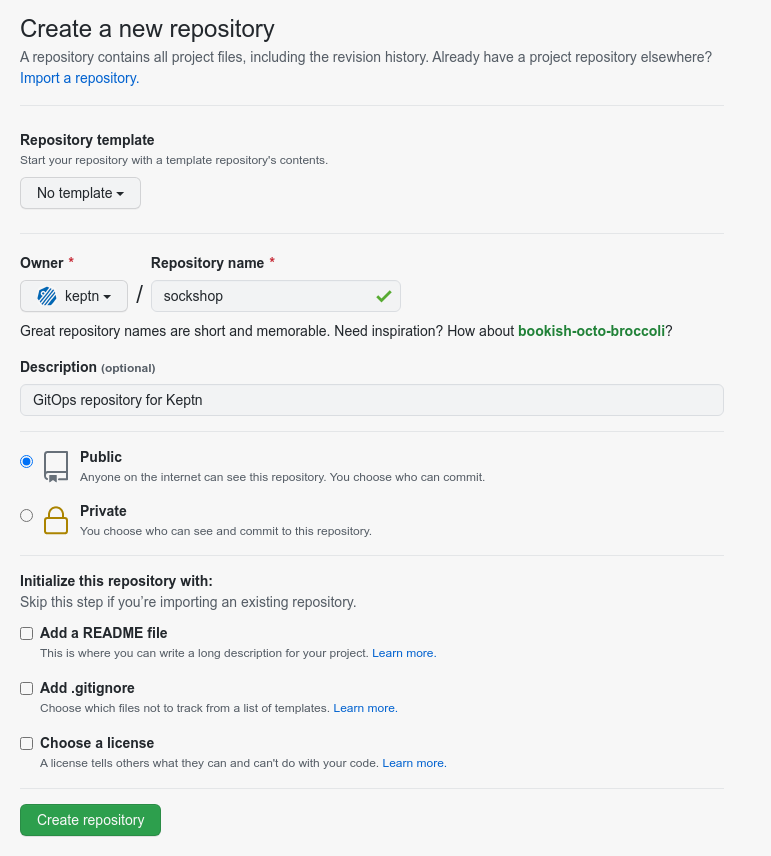
- ⚠️ The Git repository you want to define as upstream for an already created project must not be initialized, i.e., an empty repo without any commits. Therefore, do not select the check-box: Initialize this repository with a README when creating the repository.
Note about certificates: Keptn Release 0.15.x and earlier releases do not support self-signed certificates for the upstream Git repository. The new resource-service, which replaces the configuration-service, supports self-signed certificates. This feature is currently in Beta state but can be enabled with these steps:
- Use the following in the helm install command used for installing Keptn:
--set control-plane.resourceService.enabled=true in - Use the
insecure-skip-tlsflag in the CLI. For example:keptn create project <project> --shipyard=./shipyard.yaml --git-remote-url=<git-remote-url> \ --git-user=<git-user> --git-token=<git-token> --insecure-skip-tls
Create a Git repository
Select one of the four options and make sure to have the Git user, token, and remote url before continuing.
GitHub
-
If you do not have a GitHub user, create a user by signing up.
-
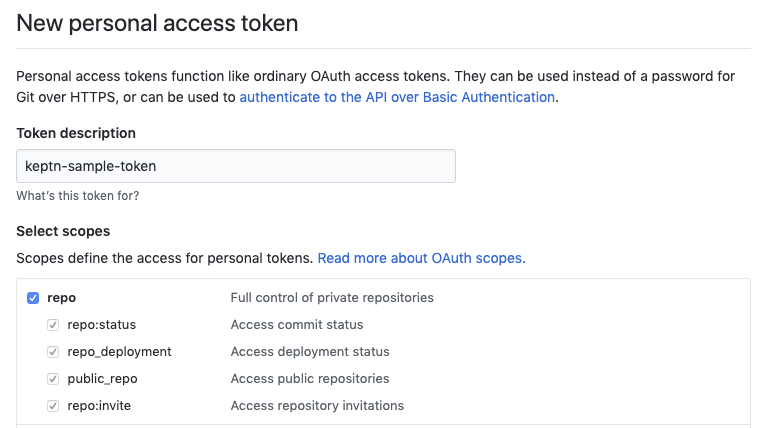
Create a personal access token for your user with repo scope:
GitHub access token -
(optional) If you want to use a dedicated GitHub organization for your repository, create a GitHub organization.
-
Go to your account or your GitHub organization and create a GitHub repository.
GitHub create repository
GitLab
-
If you do not have a GitLab user, create a user by signing up for a free trial.
-
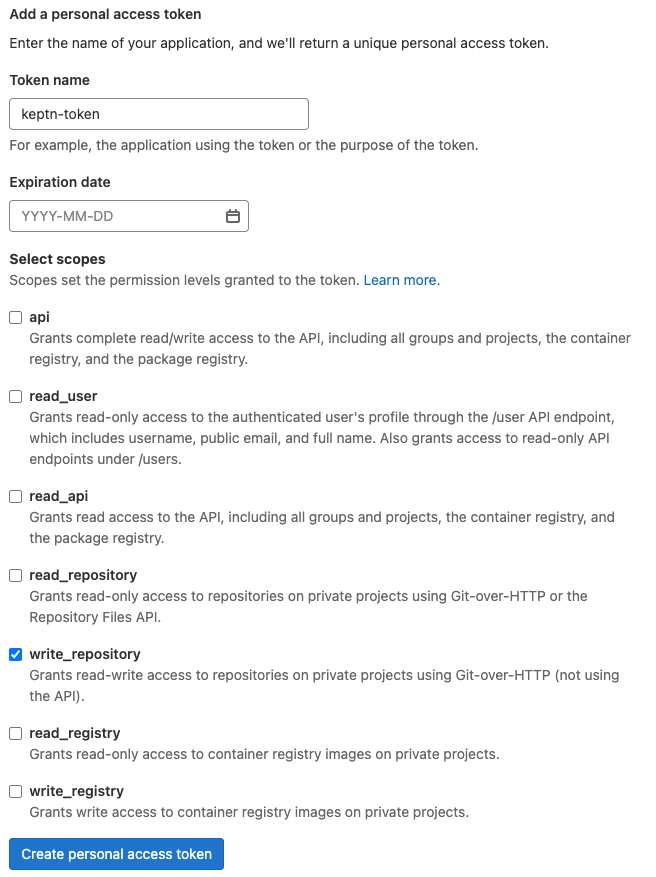
Create a personal access token for your user with write_repo scope:
GitHub access token -
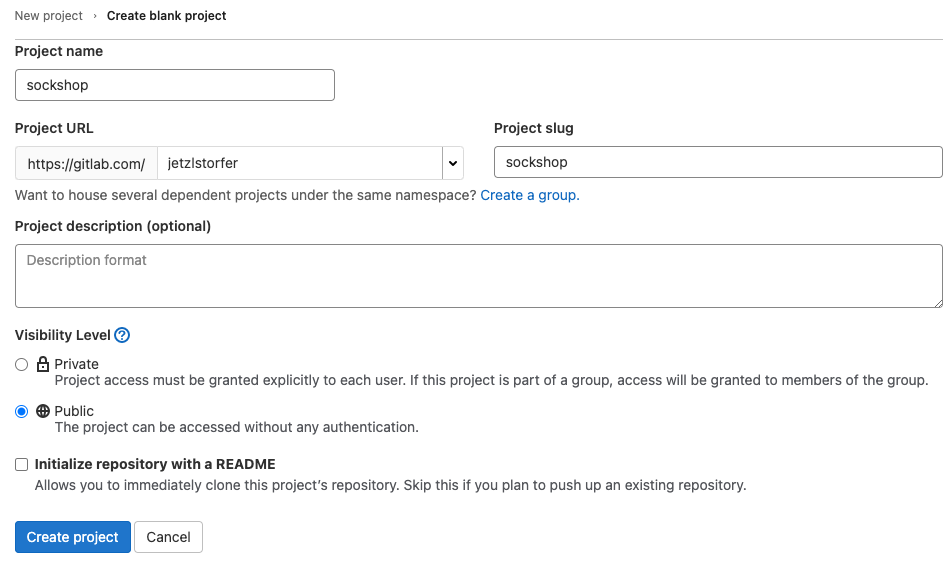
Go to your account and create a GitLab project.
GitLab create project
Bitbucket
-
If you do not have a Bitbucket user, create a user by signing up for a free trial.
-
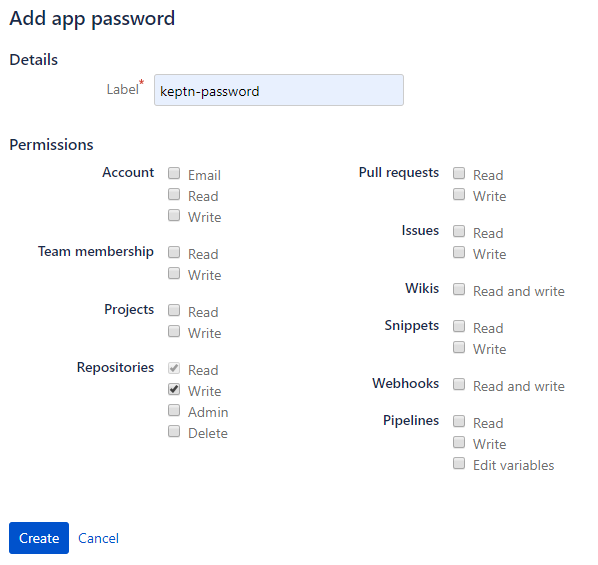
Create an app password for your user with Write permissions. Therefore, select your User > View profile > Settings > App passwords > Create app password
Bitbucket access token -
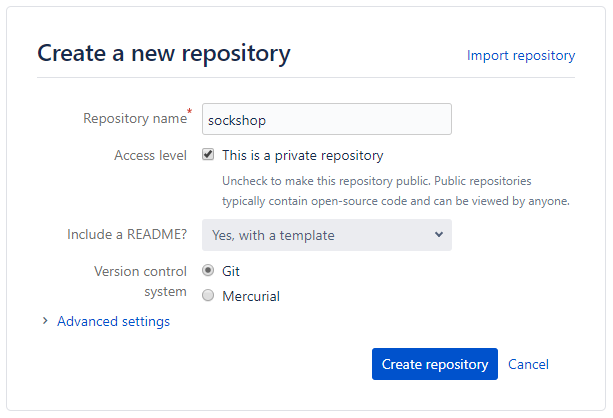
Go to your account and create a Bitbucket repository.
Bitbucket create repository
Azure DevOps Repo
-
If you do not have an Azure DevOps user, create a user by signing up for a free trial.
-
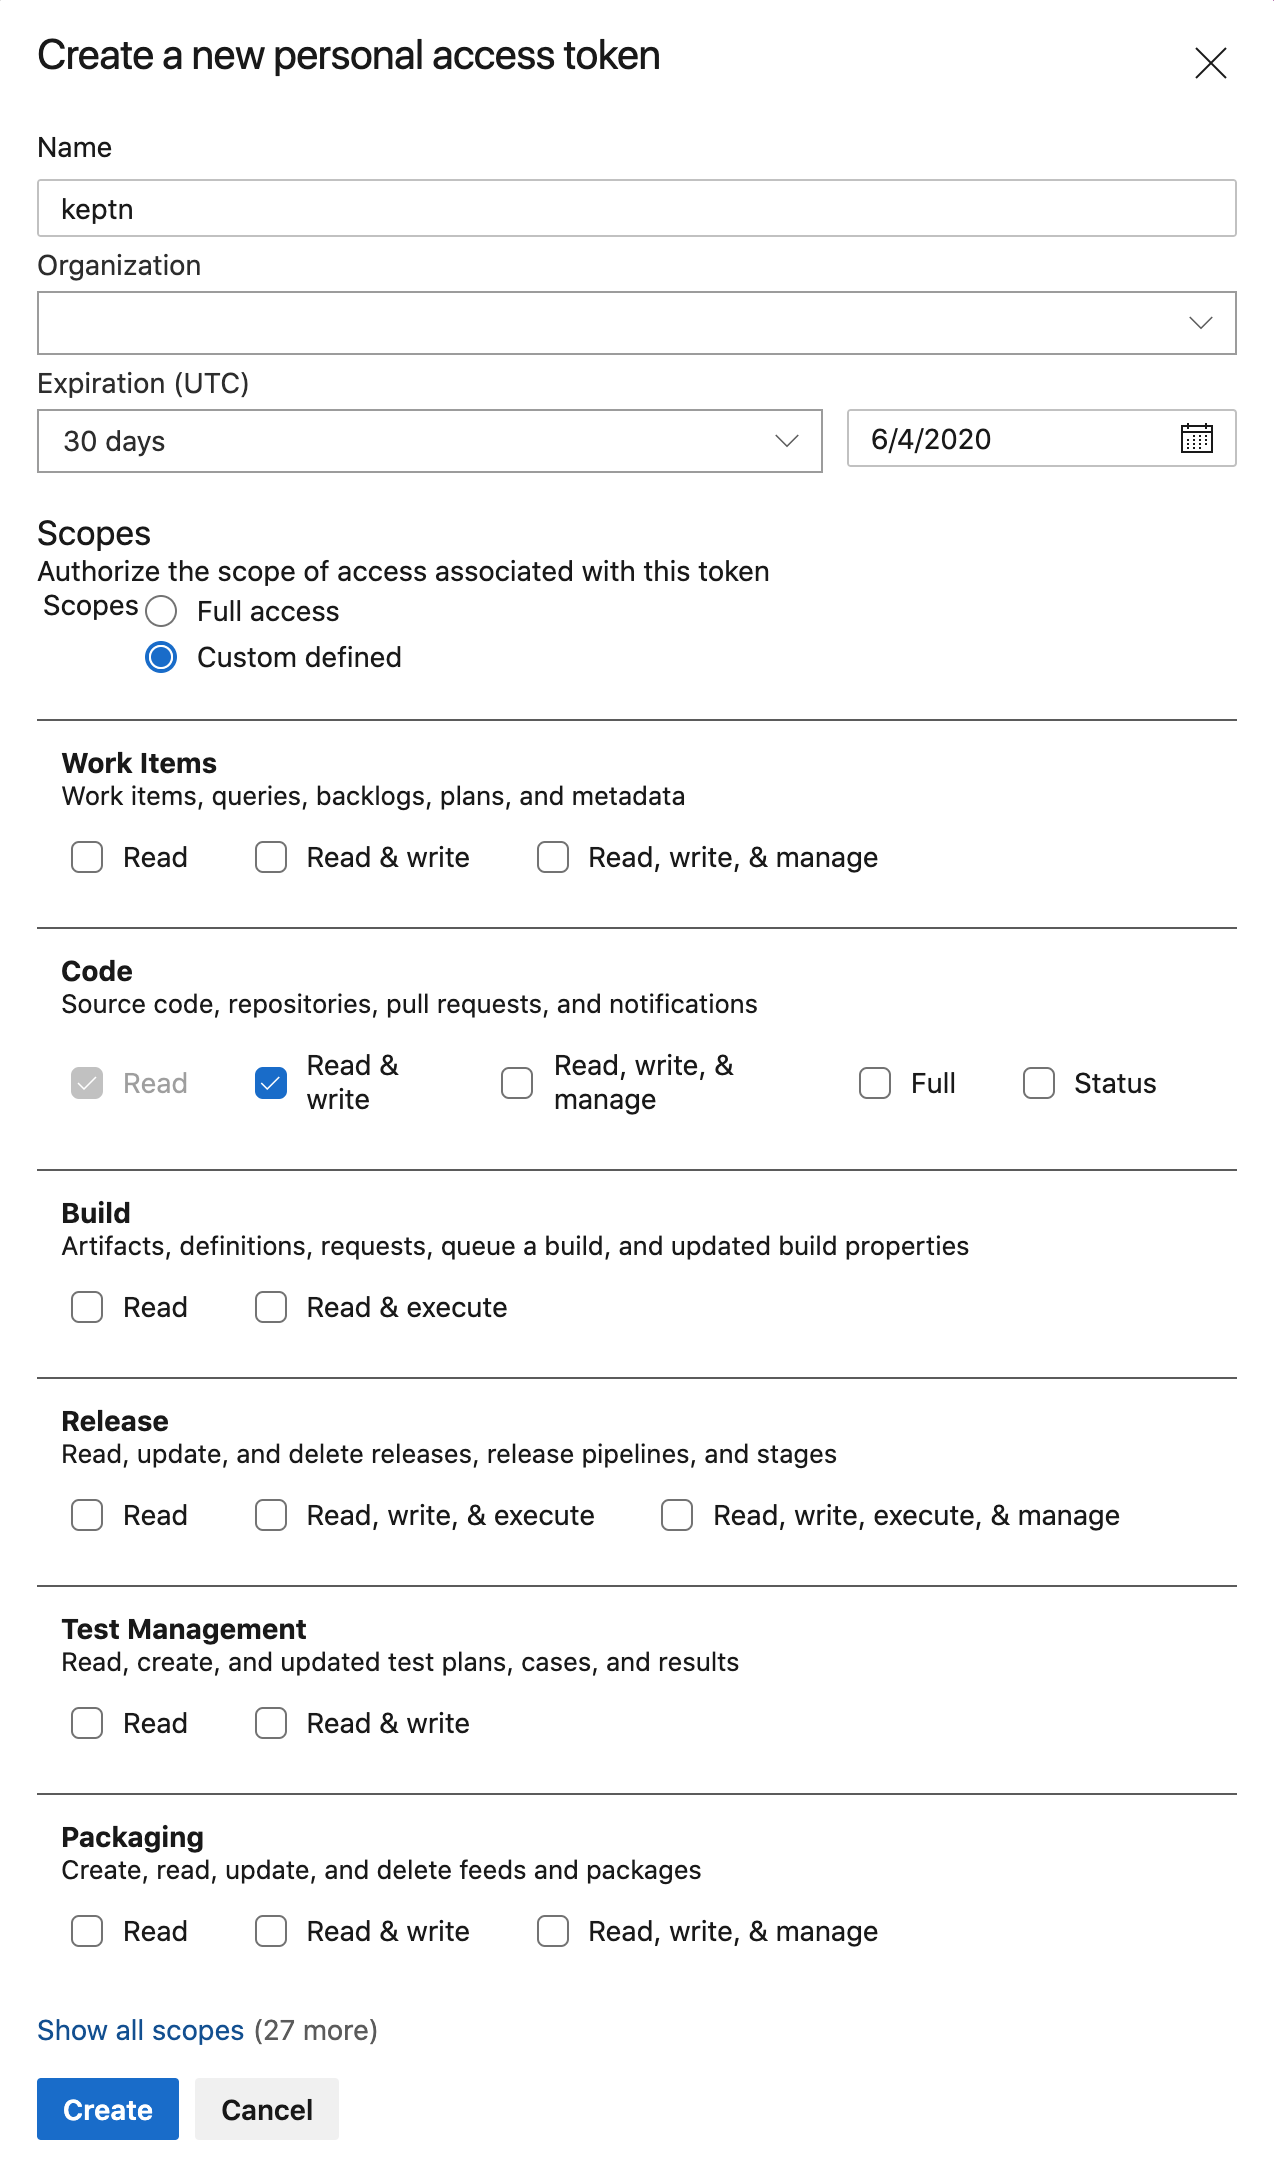
Create a personal access token for your user with Read & write access for the Code:
Note: Please carefully select the Expiration date.
Azure DevOps access token -
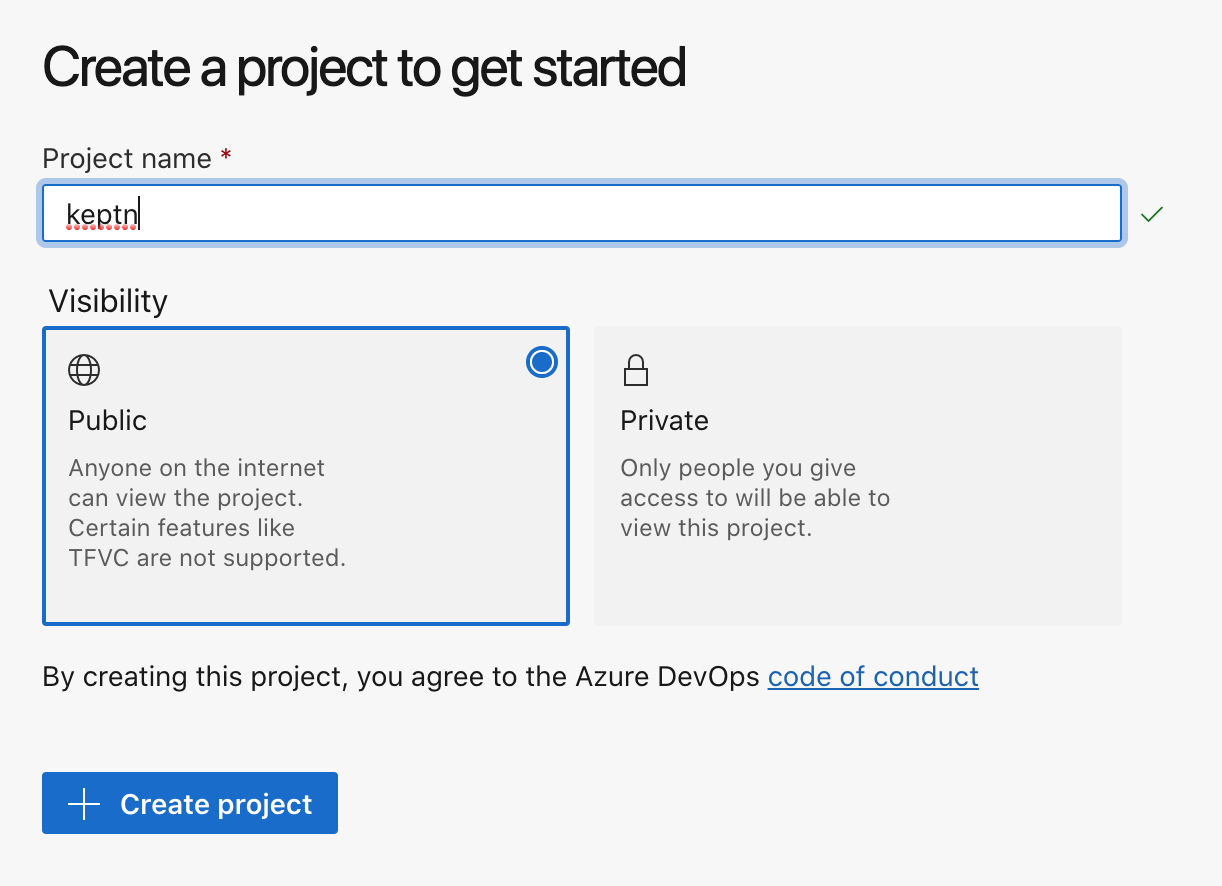
Go to your account and create an Azure project
Azure DevOps repository -
Retrieve the URL for your repository.
Important: Remove the user from the URL before passing it to Keptn. For example, in the picture below the URL would be https://dev.azure.com/YOUR-ORG/keptn/_git/keptn.
Azure DevOps clone repository
Create Keptn project or set Git upstream
-
After creating a Git repository, you can create a Keptn project as explained in Create a project.
-
If you have already a Keptn project and want to set the Git upstream, you can do this by executing the keptn update project command:
keptn update project PROJECTNAME --git-user=GIT_USER --git-token=GIT_TOKEN --git-remote-url=GIT_REMOTE_URL
See also
- Git-based upstream: Create a Git-based upstream for a project.
- Git-based upstream: Select a Git-based upstream for a project.
- Git-based upstream: Select a Git-based upstream for a project.
- Git-based upstream: Select a Git-based upstream for a project.
- Git-based upstream: Select a Git-based upstream for a project.
- Git-based upstream: Select a Git-based upstream for a project.


